Mobile video editing splits into two rough camps. One side is fast social editors, built around templates, trending audio, and a vertical export in under five minutes. The other side treats a phone like a small workstation, with layers, curves, and a timeline you can scrub frame by frame.
The second camp asks more of you. You need to know what a keyframe is, why easing matters, and how compositing differs from stacking clips end to end. In return, the output doesn’t look like everyone else’s.
Alight Motion. Video and Animation Editor sits in that second camp, and has for long enough that a lot of animation-heavy content on social platforms traces back to it.
What Motion Graphics Work Requires From a Phone App
Motion graphics isn’t the same skill as video editing, though the two overlap. Editing is about choosing and arranging footage. Motion graphics is about creating movement: a shape that scales in, text that slides and settles, a mask that reveals a layer on a beat.
Doing that on a phone requires a few non-negotiables: multiple layers that hold graphics, video, and audio independently; keyframes that can be set on any property, not just position and opacity; and control over the timing between those keyframes, since linear motion looks mechanical.
Most phone editors stop at layers. That’s the gap Alight Motion was built to fill, and the store listing calls it the first pro motion graphics app for smartphones, a fair description of what the feature list delivers.
The Feature Set Behind Alight Motion’s Reputation
What separates this app from the template crowd is that keyframe animation is available for every setting, not a curated handful. If a property has a value, you can animate it.
Easing is where that gets interesting. Pick from presets or build your own timing curves, the kind of control usually associated with desktop compositing software. Pair that with velocity-based motion blur and movement starts to read as physical rather than computed.
The layer model supports both vector and bitmap content. Editing vector graphics directly on a phone is unusual, and it matters because vectors scale without falling apart, useful when you’re animating a logo or a shape element that needs to fill the frame at some point.
Beyond animation there’s a reasonable compositing toolkit:
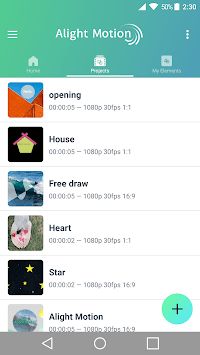
- Visual effects and color correction applied per layer
- Solid color and gradient fill effects
- Border and shadow effects
- Layer grouping, so a complex assembly moves as one unit
- Saved elements you can reuse across projects
- Export to MP4 video or GIF animation
The saved elements point is underrated. Anyone producing recurring content ends up rebuilding the same lower third or transition over and over; being able to store a favorite element turns a twenty-minute rebuild into a drag and drop.
Who Ends Up Using Alight Motion
The user base skews toward people making edits for their own audiences: fan edits, lyric videos, anime AMVs, thumbnail animations, short promotional clips for small businesses. It also picks up motion design students practicing curve work without being at a desk.
Published under the name Alight Creative, Inc., the app has built a community around preset sharing, so newcomers can reverse-engineer a look rather than start from a blank timeline. That community angle has done as much for adoption as any single feature.
It’s not the right tool for a long documentary cut or a multi-camera interview. It’s for short-form work where every second is designed.
Running Alight Motion on a Windows PC
The honest reason to move this app to a desktop is screen real estate. Timing curves, keyframe markers, and stacked layers are fiddly on a six-inch display, and a mouse gives precision a fingertip doesn’t.
Windows has no native version, so the practical route is an Android emulator, which runs an Android environment inside a window on your desktop. Setting up Alight Motion for Windows this way takes a few minutes; after that the interface behaves like a desktop application and the timeline stretches across whatever width you give it.
Two setup details matter here. Point the emulator’s shared folder at the directory where you keep your source footage and PNG assets, since importing layers is constant in this app and shuffling files through cloud storage gets old fast. And give the emulator enough allocated storage for exports, because MP4 renders from multi-layer projects with motion blur aren’t small.
Performance depends on project complexity more than anything else. A three-layer text animation renders quickly; a fifteen-layer composite with color correction on each one will make any machine work, emulated or not.
Where the desktop setup earns its keep is the custom timing curve editor. Dragging a bezier handle with a mouse, watching the preview update, nudging it two pixels and watching again. That loop is the difference between an animation that feels right and one that almost does.